
Overview
Customers may optionally configure the eLynx application to use Microsoft Single Sign On (SSO) to authenticate users via their organization’s Azure Active Directory service. This convenient sign in option allows users to open and use the eLynx application without having to login with a user ID and password each time.
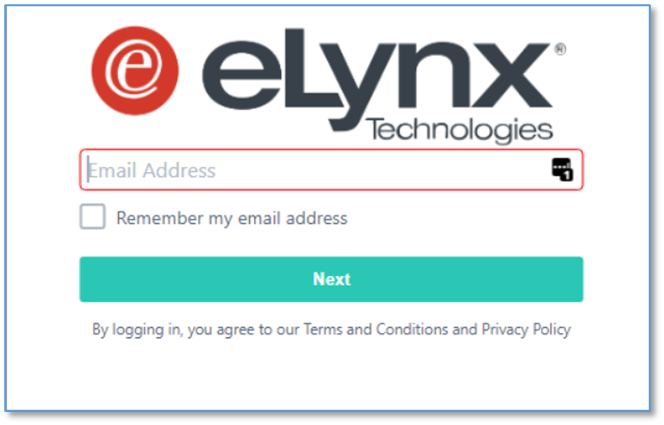
Without SSO, the user is presented with a traditional login prompt requesting an ID (email address).
This is followed by a second prompt requesting entry of the user’s password.

Once SSO is configured for a user, the ID and password prompts will no longer appear since authentication is provided by the user’s organization credentials when they logged in to their system (e.g., Windows, Outlook, etc.).
The high-level steps to setup Single Sign On (SSO) for the eLynx application include:
- Obtain your organization’s Azure Active Directory ID (also called Tenant ID) from your IT administrator.
- Provide your organization’s Azure Active Directory ID to eLynx Support to setup SSO.
- eLynx Support will configure your eLynx subscription to allow Single Sign On for your organization.
- Obtain the name and email address of each user in your organization that will be using the eLynx application.
- Within the eLynx application, open the User and Role Administration page for each user and enter their email address in the Single Sign On Name
- Approve the permissions request to view the user's basic profile and maintain data it has access to.
Each of these steps is discussed in greater detail in the following sections.
If you have any questions or need assistance please contact eLynx Support at support@elynxtech.com or 866-303-5969.
Step 1: Obtain your organization’s Active Directory ID (aka Tenant ID)
IMPORTANT: Please consult with and obtain approval from your organization’s IT administrator before providing this information.
This information can be obtained from the Azure Resource Manager Portal on the Properties tab in the Tenant ID field. This is typically a 36-character value of mixed numbers and letters. For example: 123456d7-a890-12ed-ac34-5bd678b90ec1
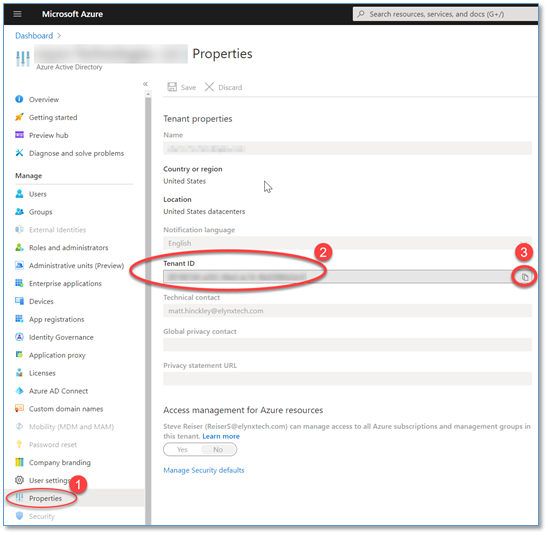
In the Azure Resource Manager Portal:
- Under the Manage section, click on the Properties menu item.
- Locate the Tenant ID
- Click the Copy icon on the right side of the Tenant ID field.
Step 2: Provide your organization information to eLynx Support to setup SSO
- You may contact eLynx Support via email at support@elynxtech.com or phone at 866-303-5969.
- Please provide the following information to eLynx Support:
- Your name and contact information
- The 36-character Azure Active Directory ID (also called Tenant ID)
- eLynx Support will create a Support ticket capturing this information and will send a copy to your email address.
Step 3: eLynx Support will configure SSO for your organization
- eLynx Support will use the provided Azure Active Directory ID to configure Single Sign On.
- When finished, eLynx Support will update the Support ticket and you will receive an email notification informing you that the users may now be setup in the eLynx application.
Step 4: Obtain the name and email addresses of your eLynx users
- Please obtain the name and email address of each user that will use the eLynx application and for whom SSO should be enabled.
- This must be an email address that is attached to their organization’s Microsoft Work Account.
- The accounts must be a Work Account registered in the organization's Azure Active Directory tenant.
- This will not work with personal Microsoft accounts.
- For example:
- John Doe, john.doe@yourcompany.com
- Jane Smith, jane.smith@yourcompany.com
- Jim Jones, jim.jones@yourcompany.com
Step 5: Setup each user in User and Role Administration page
Your organization’s eLynx Administrator typically performs this step to configure each user for Single Sign On. If assistance is needed, a request may be submitted to the eLynx Support team to perform this activity for a nominal fee.
- For each user, open the User and Role Administration page of the eLynx application.

- On the General tab, enter the user’s email address in the Single Sign-on Name field.
- Click the Save button to save changes.
Step 6: User Login and SSO approval
Now that SSO has been configured, the final step is to approve permissions for the eLynx app. The next time the user starts the eLynx app they will be presented with the Login page to enter their email address.

The user may proceed with logging in as follows:
- Enter the email address used to access the eLynx application.
- Optionally, click the checkbox to Remember my email address. This will prevent the user from having to enter their email address in future sessions.
- Click the Next button to proceed.
If this is the first time the user is logging in after SSO has been enabled, then the user will be presented with a dialog requesting approval of app permissions including:
- View user’s basic profile
- Maintain access to data you have given it access to
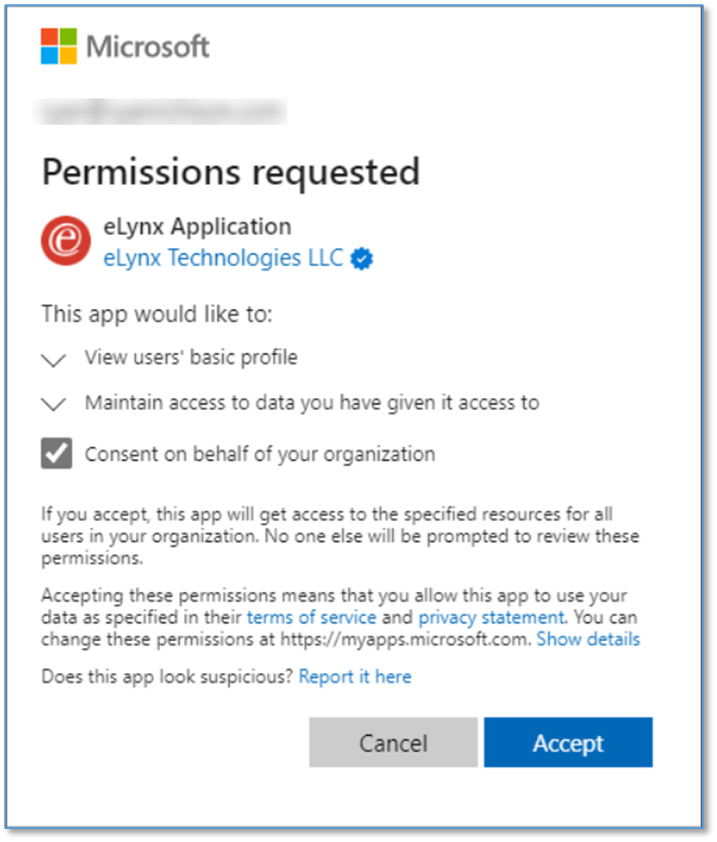
IMPORTANT NOTE: The checkbox for Consent on behalf of your organization will appear ONLY for customer Azure Active Directory (AAD) administrators. If clicked, this will accept consent for ALL users in the organization and they will no longer receive the permissions request prompt going forward. Otherwise, each user will receive the permissions request prompt upon first login as described below.
To respond to the permissions request, the user should do the following:
- Optionally, learn more information by clicking the links to:
- Review eLynx Terms of Service
- Review eLynx’s Privacy Statement
- Show details of the proposed permissions changes
- If the user DOES NOT wish to use SSO and/or grant the permissions:
- Click the Cancel
- The SSO setup process will be halted.
- The user must notify their organization’s eLynx admin that they do NOT wish to use SSO so they can reconfigure the user in User and Role Administration.
- If the user DOES want to proceed with granting permissions and using SSO:
- ADMINS ONLY: Optionally, place a checkmark in the checkbox next to Consent on the behalf of the user’s organization.
- This will effectively click the Accept button on behalf of all users in the organization and they will no longer be presented with the permissions request dialog.
- Click the Accept button to apply the permissions changes and proceed.
- The user is now fully configured with appropriate permissions to use SSO with the eLynx app.
- The next time the user starts the eLynx application they will automatically use their organization credentials via SSO and will not be presented with the Login
- ADMINS ONLY: Optionally, place a checkmark in the checkbox next to Consent on the behalf of the user’s organization.
Please contact eLynx Support at support@elynxtech.com or 866-303-5969 with any questions or if assistance is needed with this process.
Thank you for being an eLynx customer!
Comments
0 comments
Please sign in to leave a comment.